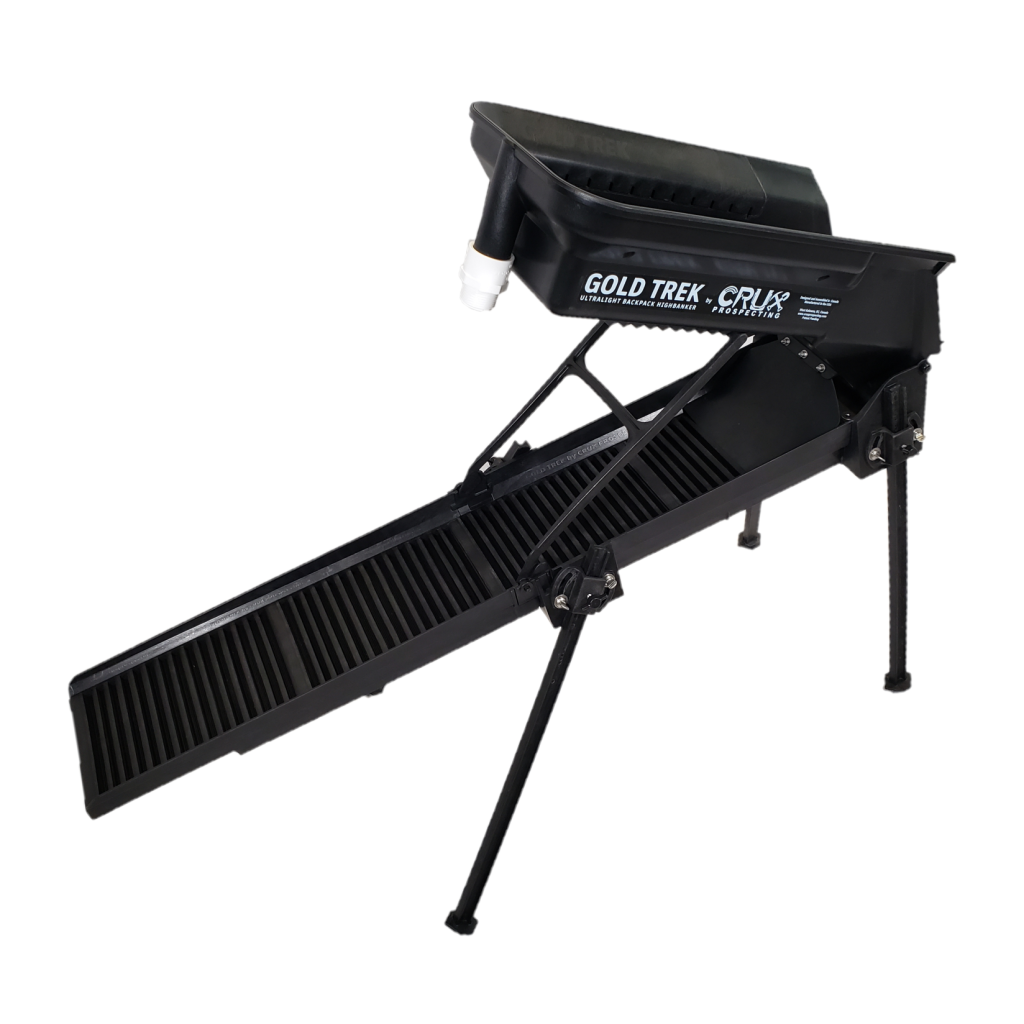
Gold Trek Setup Instructions
Gold Trek 6” Takedown Backpack Highbanker by CRUX Prospecting
Setup Instructions
I want to thank you for your interest in The Gold Trek! This highbanker is a little different than you might be used to seeing so this set of instructions is specifically aimed at first-time setups. I’m confident that, after you’ve set it up once, you’ll see how intuitive it is and you’ll never need to reference these instructions again.
When you first receive your Gold Trek, I highly recommend first setting it up in the comfort of your home or garage and getting familiar with all the components. These instructions will follow my personal preference for setup but you may develop your own in time. Your Gold Trek will arrive assembled with all hardware and components in the “packed” state. The hopper pivot pins, mats and grizzly screens will be in the hopper and the legs will be nested inside the sluice box. Once you’ve removed the system from the box and the mesh carrying bag you can assemble for use by following along with these steps:
This the Gold Trek in its “packed” state.
Note: a pivot pin has been installed where the hopper hinges on the lower sluice sections. Start by inserting one of the pins through the side of the sluice base, through the hopper back rail and out the other side of the sluice base. Use the provided C-clips to secure the pin. The pin can be left in place permanently and there is no need to disassemble this part for storage.
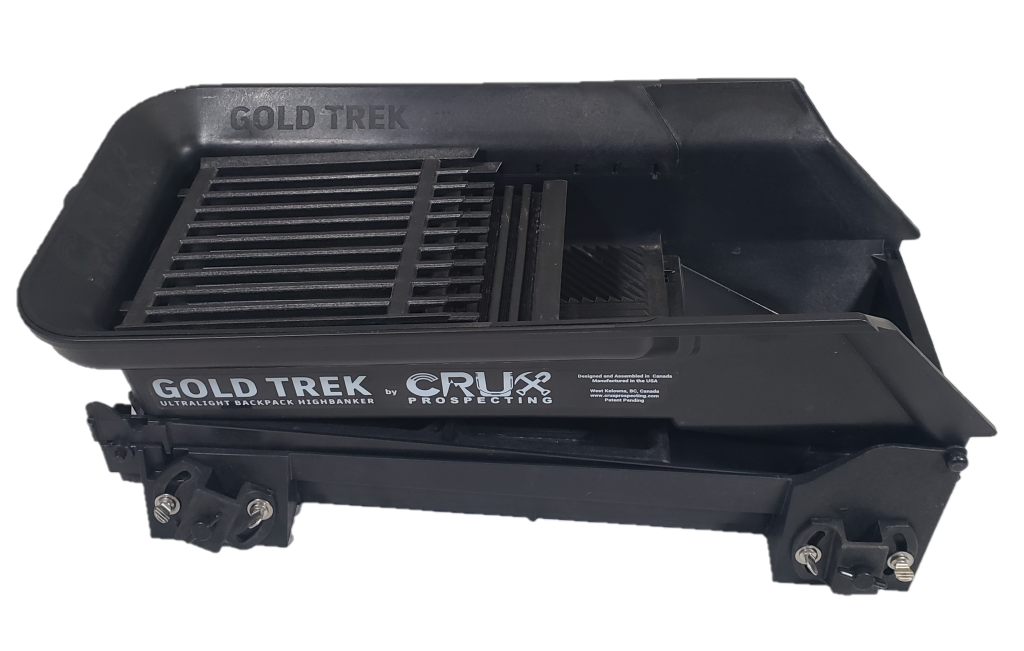
Remove accessory bag inside the hopper. Lift the Hopper and remove the legs.
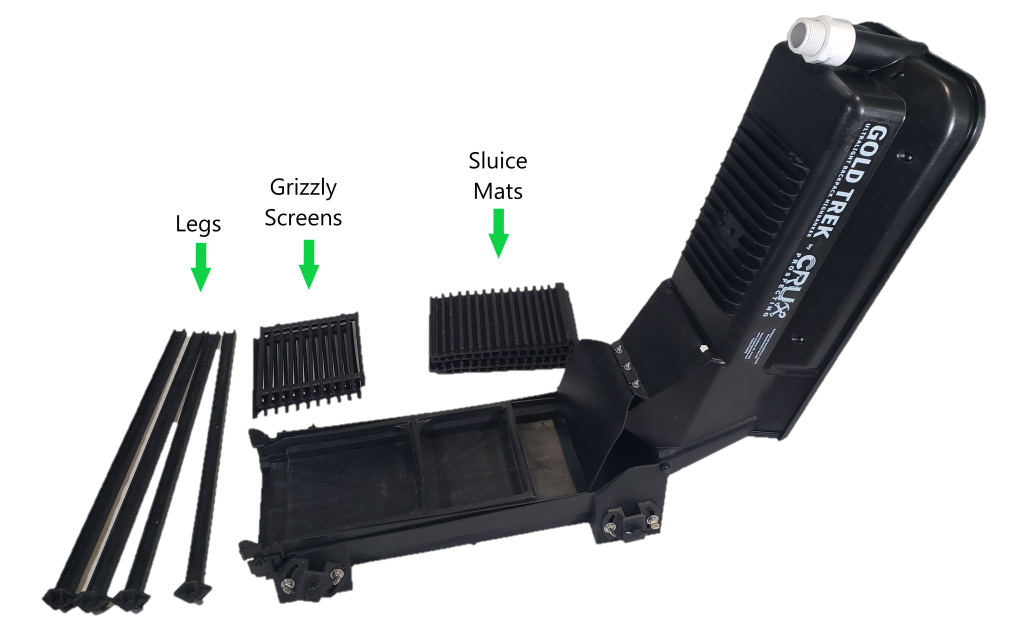
Identify the 4 corner brackets, this is where the legs are installed. These brackets adjust up to 60 degrees to allow for setup on uneven ground. Each one is installed on an angled platform to widen the stance of the legs and significantly increase stability.
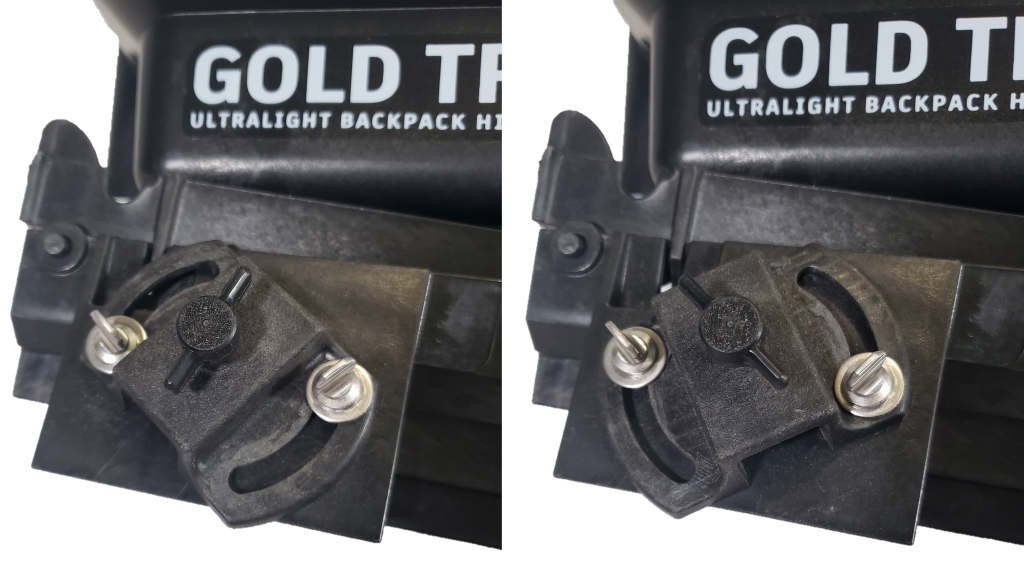
Insert all 4 Legs into the 4 corner brackets and tighten the center black toggle. You may need to pull up on the black toggle to seat the nut on the inside. Take care not to loosen the toggle too far or the inside nut may fall out. Some people choose to epoxy or glue this nut inside the bracket if they are concerned about losing parts.
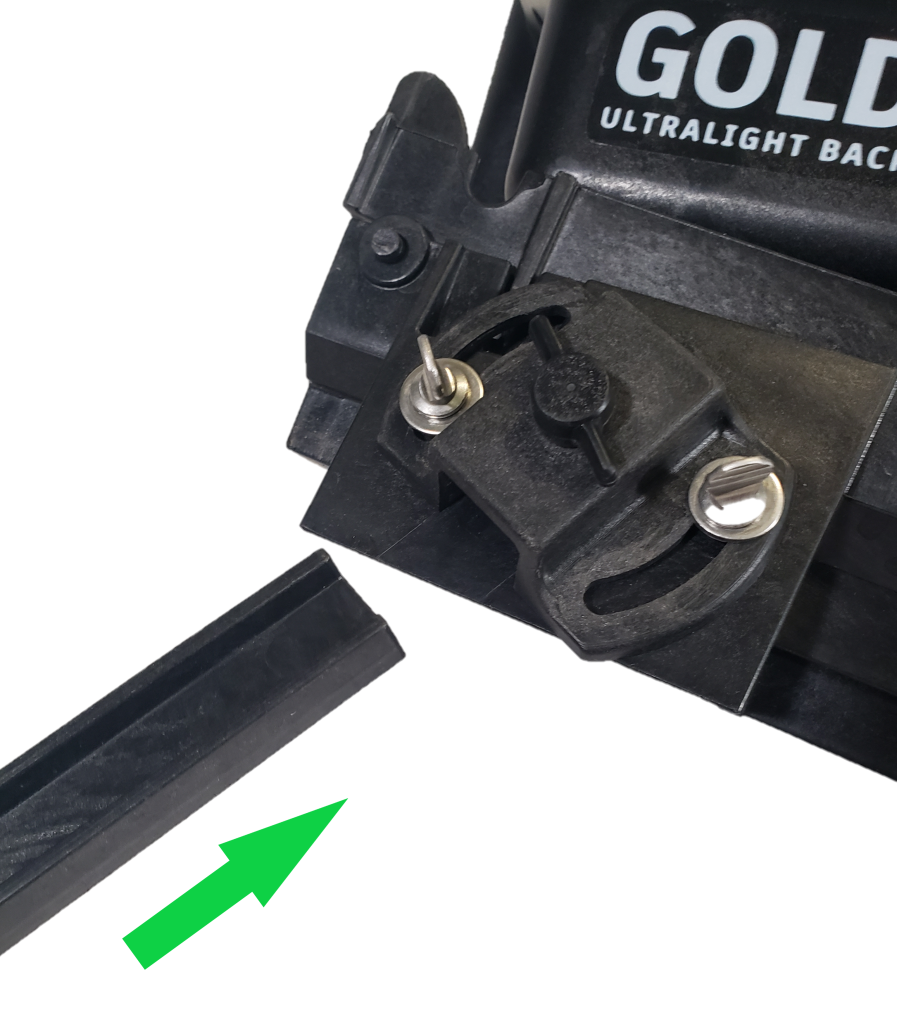
Once the legs are installed, stand the system up. You can now identify the hopper support arm which is installed between the nested sluice sections. The pivot pins through the walls of the base are designed to be under tension to lock the two sluice sections together when packed.
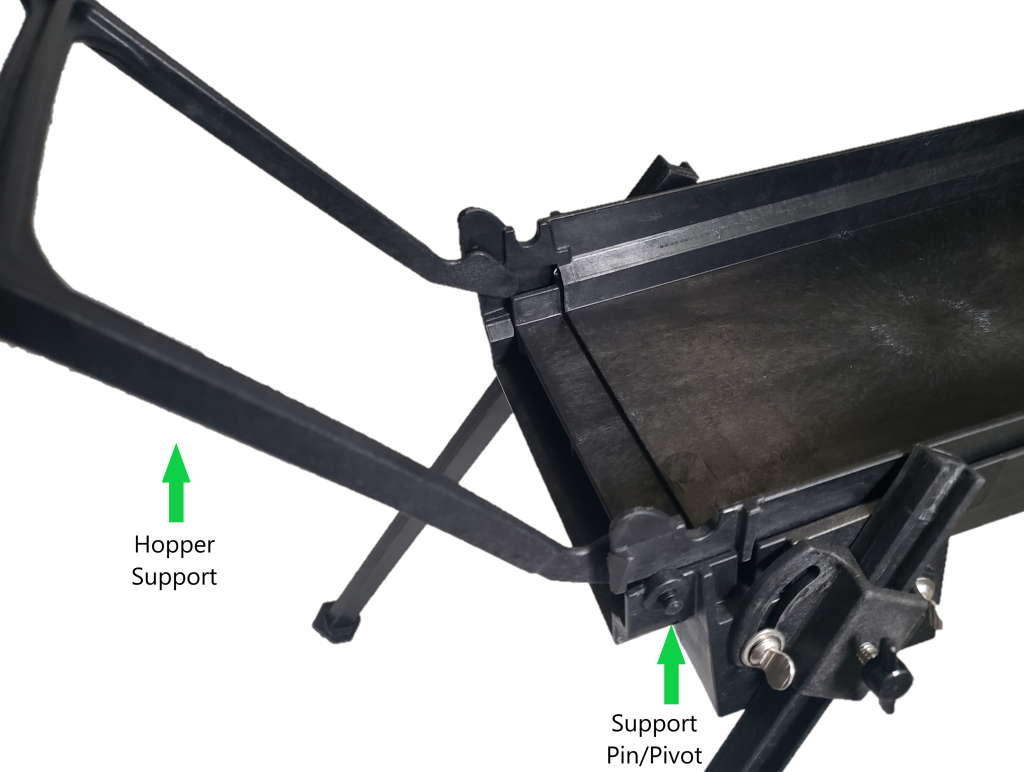
Once you’ve identified the support pins, flex one side of the support arm inward to remove the pin from the base. When one side is out, tension on the arm can be released. Remove the other side’s pin to fully separate the support from the system and set aside.
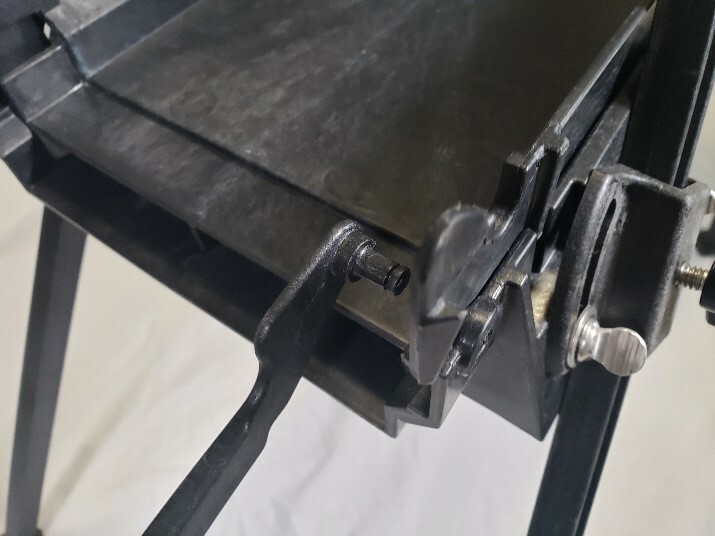
With the support arm removed, you may now lift the nested lower sluice section and remove it from the base.
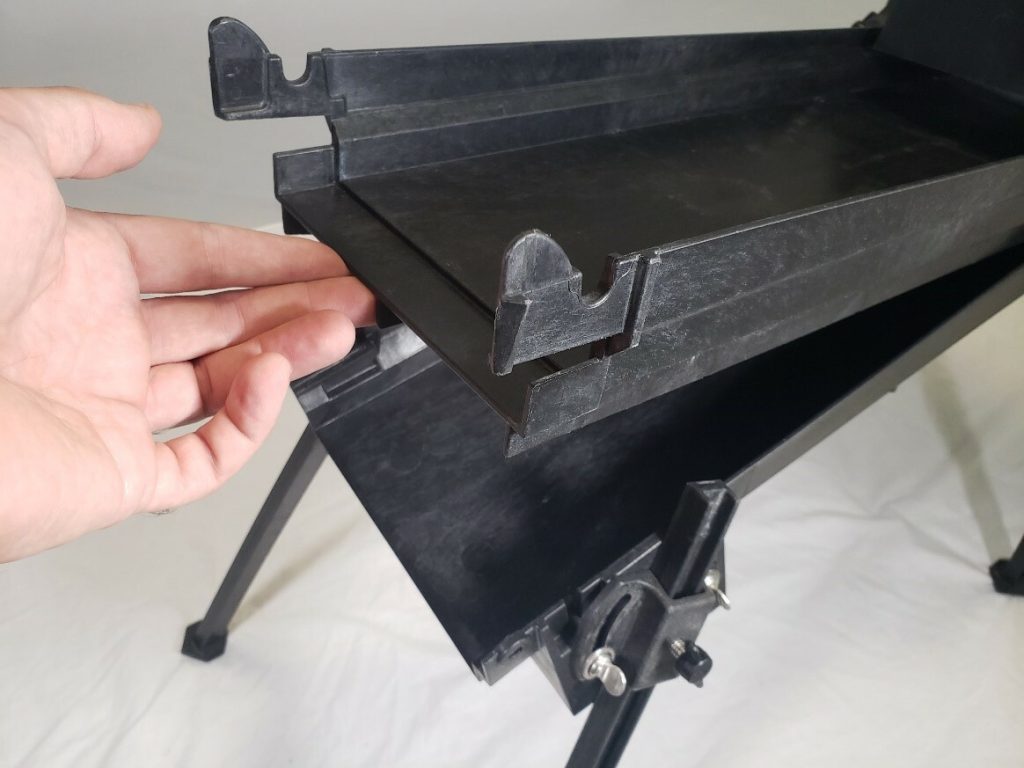
With the lower sluice section removed, turn it 180 degrees and line up the tabs to connect it to the base. The tabs are designed so they must be flexed inward slightly to fit inside the base walls. The lower under lap area will go under the base of the sluice floor.
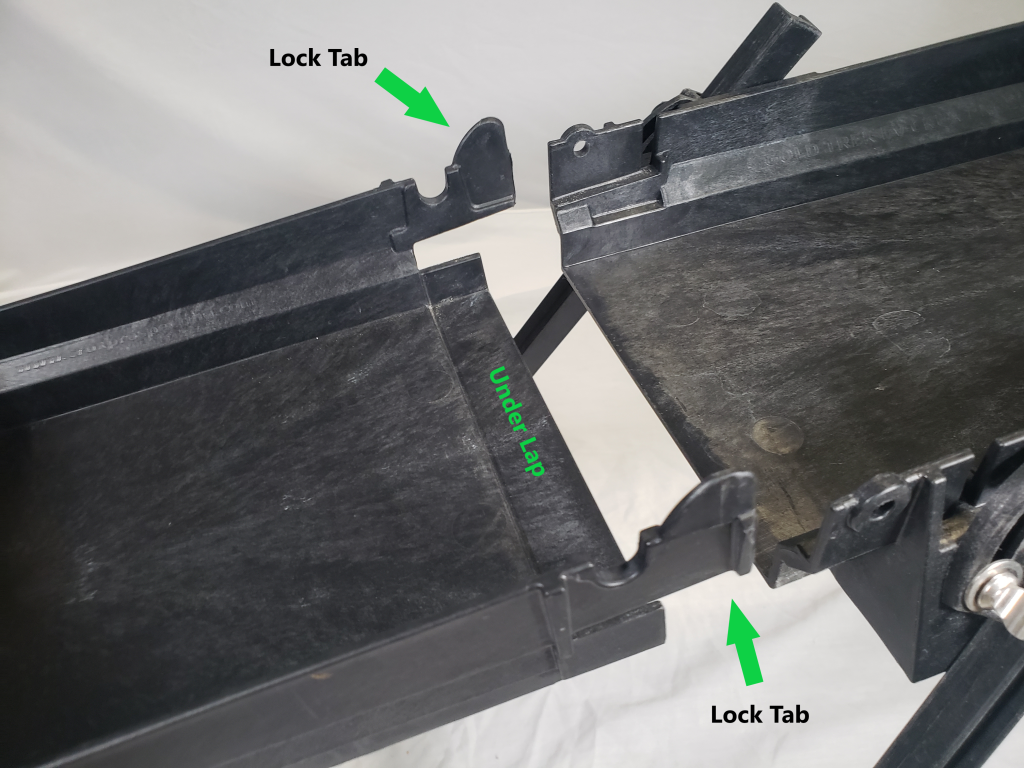
When fully seated, the tabs will engage with the vertical notches in the base wall and click into place. Notice that the support pivot hole is now visible and aligned with the tab’s U-shaped notch. This U-notch allows the large, stepped barrel on the support pivot to support the hopper without relying on the pin alone.
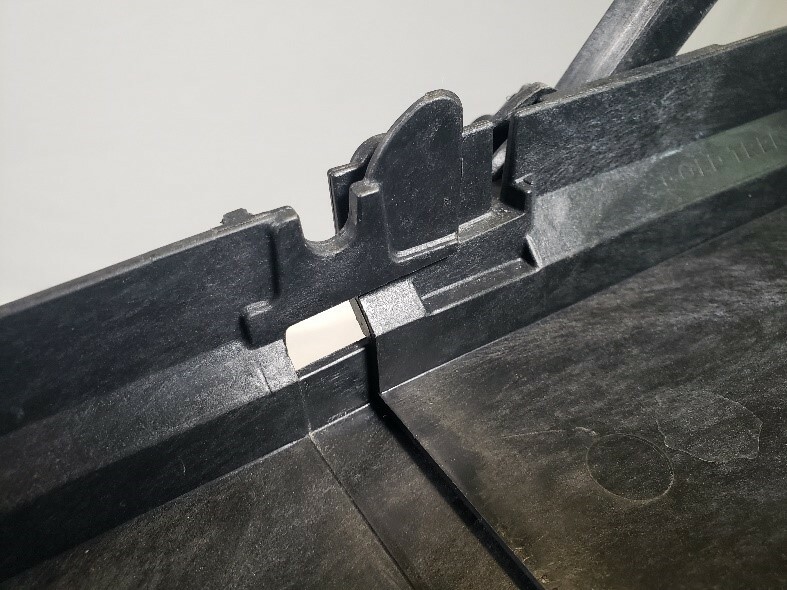
Once the sluice sections are locked together, you may reinstall the hopper support by inserting one side’s pin through the base wall and flexing the support arm to allow insertion of the other side.
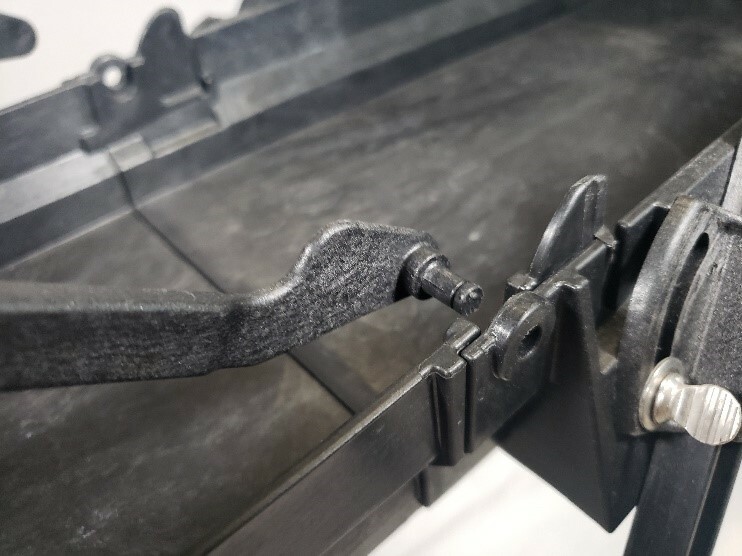
With the hopper support now locking the sluice pieces together and the hopper still pivoted out of the way, we can now install the sluice mat. Start by sliding the first mat under the pre-installed mat strip. Make sure it’s lapping correctly and pressed tightly into position.
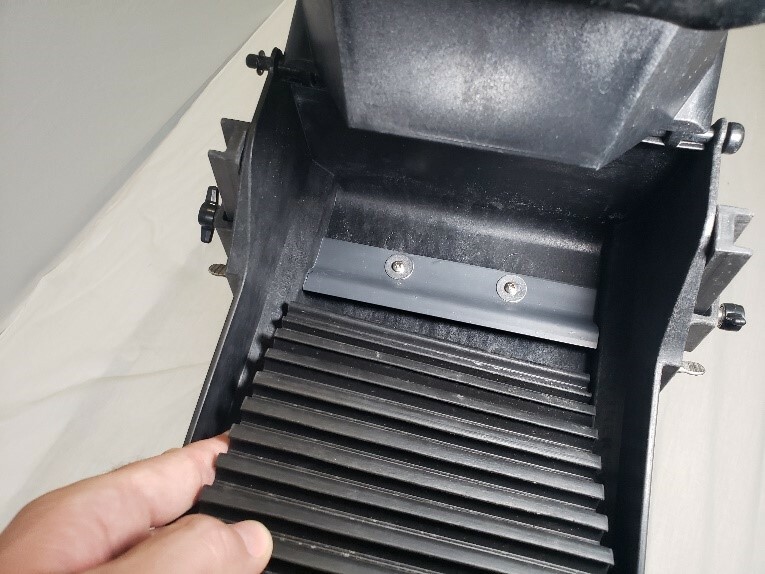
Continue with the next mat section by sliding it under the first and pressing the mat interlock down snugly to lock the mats together. Continue with this step for remaining sections of sluice matting.
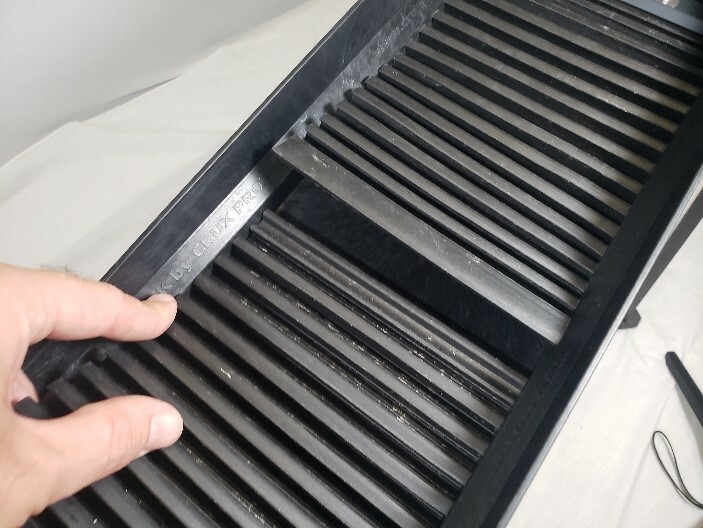
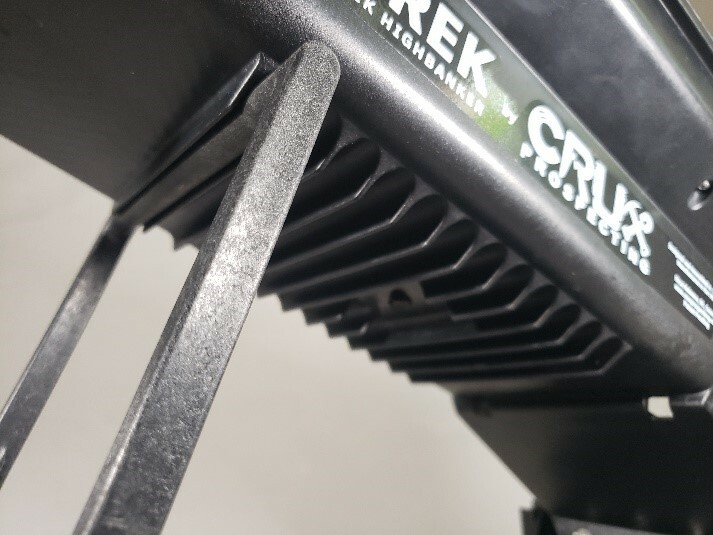
With your sluice matting fully installed, pivot the hopper to engage the notches on the bottom of the hopper with the hopper support arm. Select the notch to adjust the hopper pitch depending on personal preference or paydirt composition.
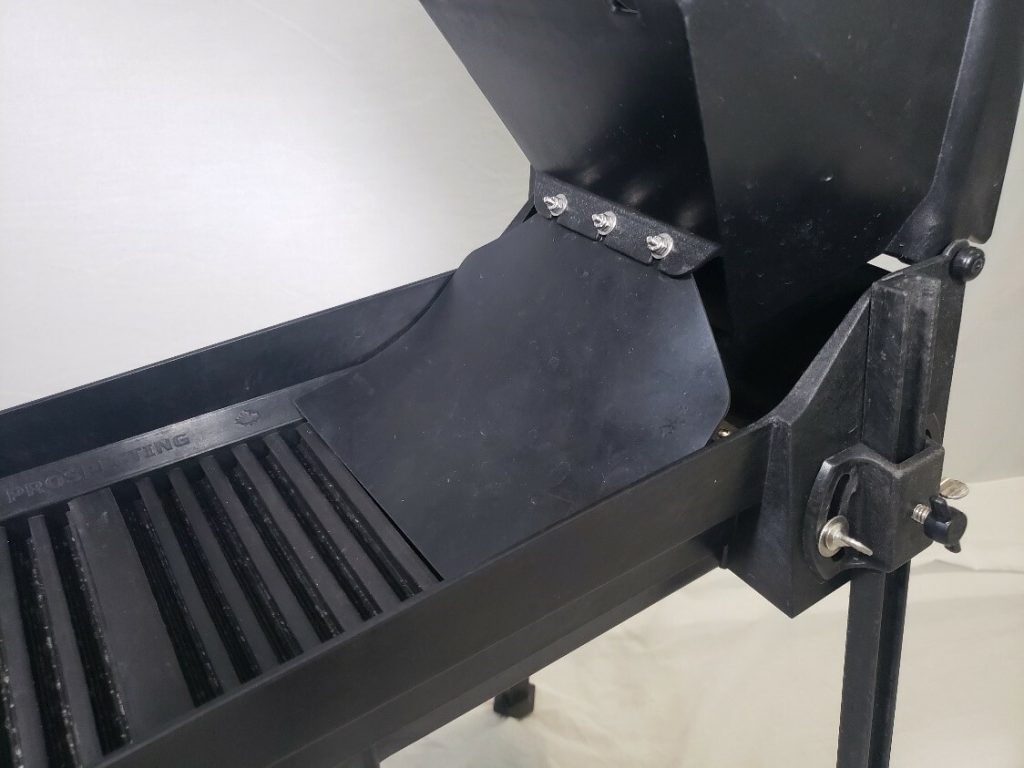
At this time, ensure that your damper is set correctly and not stuck in the sluice mat or folded under the hopper diverter.
Looking at the inside of the hopper, you can see the textured pattern that helps direct material to the center. You can also see the 2 holes for the grizzly screen tabs as well as the top side of the large material diverter.
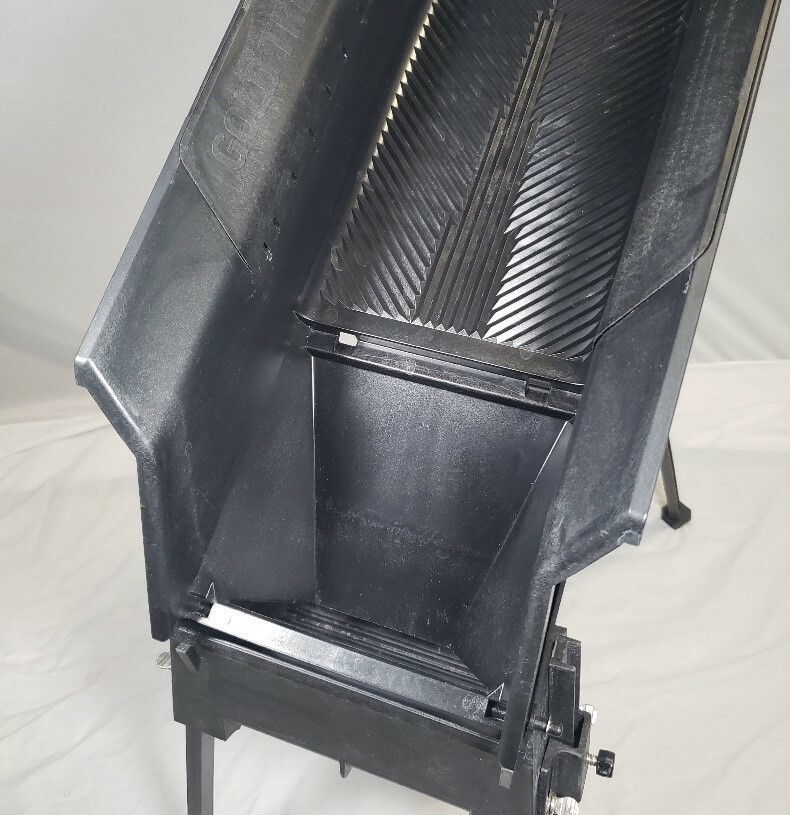
Choose a grizzly screen, either 3/8” or 1/2” classification. Line up the tabs of the screen to the receiving holes in the floor of the hopper. Insert the screen into the receiving section at an angle and press down to lock into place.
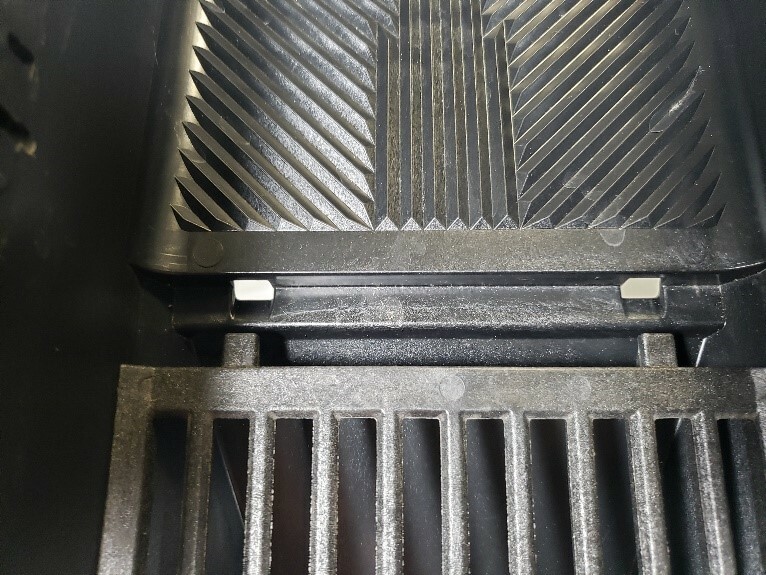
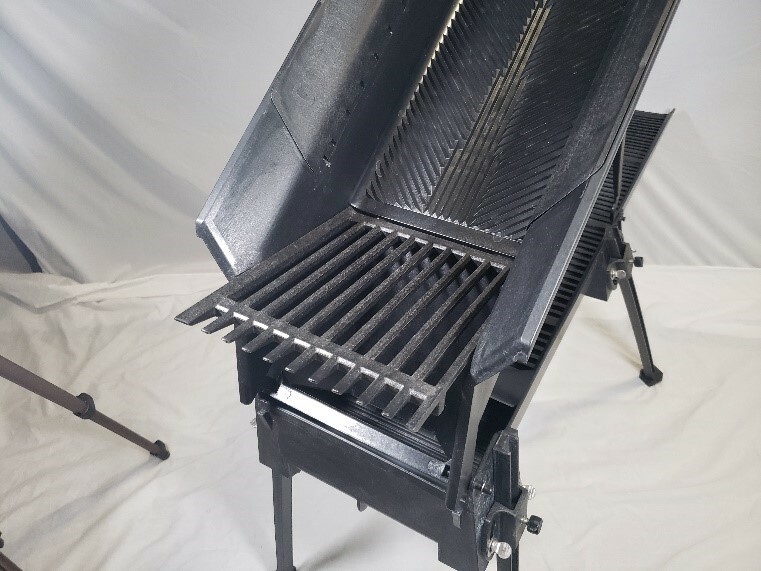
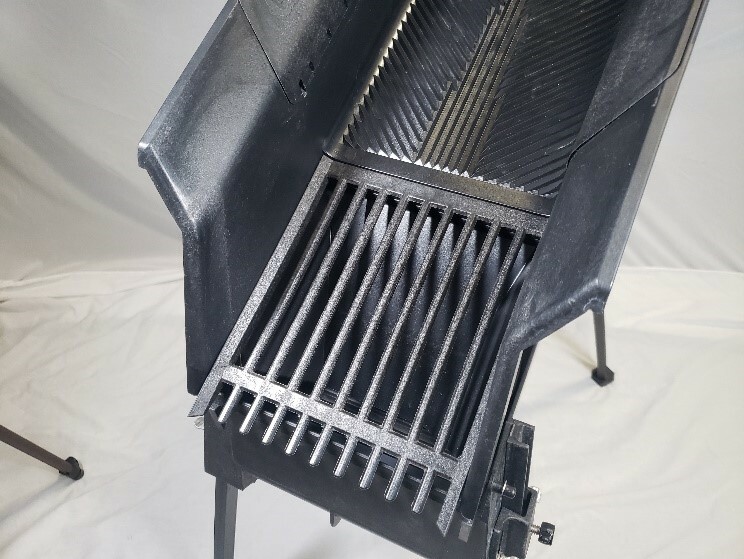
Locate the PVC fitting that came with the system an press-fit it onto the hopper intake. This fitting may differ from the photo. Ensure it is tightly secured prior to attaching water hoses and adding water pressure.
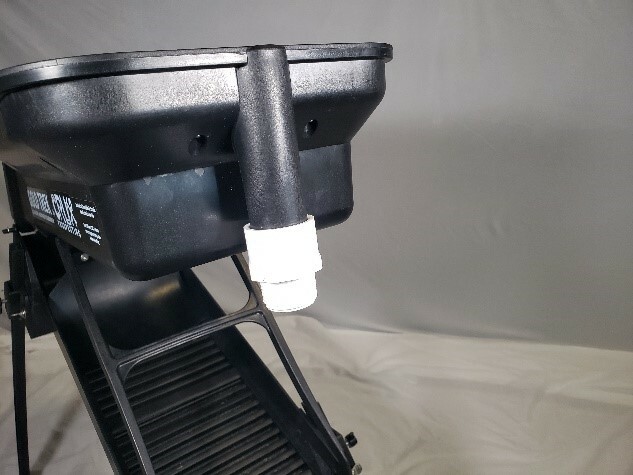
Your Gold Trek 6” Takedown Backpack Highbanker is now fully assembled and disassembly is as easy as just reversing these instructions. Now go get that gold!